 If you grew up on a property that was overrun by snakes like my brother and I did, then it was only a matter of time before running into a big snake that could pose serious issues. While we were relatively lucky, venomous snakes were rare in our area and we only saw one rattlesnake over 15+ years, having good tools to handle big bull snakes that looked grumpy all the time – well that would have been helpful.
Whether dealing with large snakes that have a predilection for being aggressive or dealing with venomous snakes that need to be removed away from where people walk and children play, the right tools are crucial for getting the job done.
While we do recommend looking at buying a pair of professionally made snake tongs, if you’re itching to go the DIY route, then you had better have good materials, a good design, and this informational article to help guide you through.
We recommend using not only these instructions in the post but also playing these videos for more of a visual guide. Of course if there’s a specialist in your area willing to teach you in workshop how to make a reliable pair of homemade snake grabbers then that is certainly a great way to go.
For the rest of us who don’t know that person, this is the best online guide (complete with supporting videos) for what you need to do in order to create a good pair of snake tongs.
Table of Contents
Very Good Step by Step DIY Snake Tongs Video
Step by Step Guide
Note: To try to add extra value and guidance, occasionally the step here will also have a time stamp to a part of the video above to give a visual aid to clarify things. While the builds aren’t 100% the same, there are points that you can reference when you need a bit of a visual – at least until we get our workshop space back to be able to get original photos and videos ourselves.

#1: Get a Design or Draw Your Design
While many people understand the basic tongs concept, it’s important to note that snake grabbers can actually have very different designs. This is especially true when looking at the grabbing end. While some tools and materials are going to be needed regardless, there are many materials or tools that are going to be needed based on which design you pick.
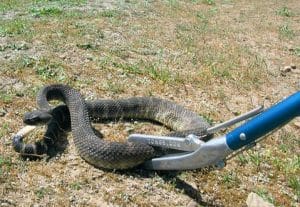
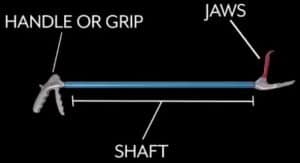
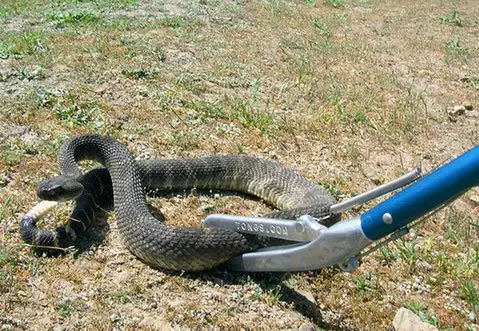
Pay special attention to the trigger mechanism, the length you want your snake tongs to be, as well as the jaws of the gripping tongs. Are you going to use metal ones like in the main image in this article, customize your own like in the video (the 3:57 mark is an excellent spot to see them completed and mounted), or more of a shovel-scoop design?
This is going to make a difference in how you are going to go about the build. However, the only way to be properly prepared is to draw out the entire design up front so you know exactly what you’ll need.
#2: Gather the Proper Materials
Once you have the plan and designs picked out, you will need to gather all the proper materials before you begin. This isn’t the type of project you want to grab one piece at a time, so having a solid plan is crucial so you have all the materials on hand. As long as you have everything you need you can work on various parts of your homemade snake tongs in whatever order you want.
Materials you’ll need:
- Long metal tube, either steel or high grade aluminum
- Round head screws
- Bolts & washers
- Sheet of aluminum and/or wood (to carve out pieces for the jaws)
- Steel wire/cable
- Spring
- Wood to carve out handle (and possibly part of the jaws)
#3: Get Access to the Proper Tools
You won’t need too many tools to put together a homemade DIY snake tongs, but you will want to make sure if you don’t own all of these that you at least have access to them. There are some base tools that you’ll need no matter what, and those are the ones that are listed under the tools section of this section.
Depending on if you’re building the entire thing from scratch including creating your own custom-made components and parts or going with some pre-cut parts to simplify the process of making your own snake tongs, your tool needs may vary.
Tools you’ll need:
- Electric drill
- Electric screwdriver (flathead tip) or flathead screwdriver
- Belt sander
- Table saw
- Hand held saw, circular blade
#4: Cut the Main Shaft Tube
This is going to be the base of your homemade snake tongs. Make sure you are using a high quality metal that is going to hold up to stress and use. You want a long hollow tube and if in doubt make it a touch longer than you think you’ll need in case you make a mistake. You’ll want to make the wood handle during this time while you’re also making the trigger.
You will need two drill a couple holes both near the front and back of the metal tube. The ones towards the handle will be used to drill two long screws through the metal tube and into the wood handle.
PRO TIP: Use a belt sander with the wood handle to help make sure the fit is solid (Video 3:00 mark).
The other holes will be used to string the cord (we recommend metal cord for durability) through the tube, connecting the handle/trigger with the actual claw at the end. This sets up the perfect frame to make sure you’ll be able to string all the parts together.
#5: Build Handle & Trigger Together
Because you want these pieces working together as smoothly as possible, you should look at building them at the same time during the process. Generally speaking we recommend using a wood handle. Get the type of wood you want and use a band saw or your home brew alternative equivalent in order to cut, sand, and shape the handle so it is comfortable to grip, fits right in your hand, and is perfect to set the shaft into.
The trigger needs to be built next. The exact build will depend a lot on the plans you go with, but this is where the spring and long cord setup comes into play. The setup should make it so pulling the trigger closes the jaws while no pressure means they are open.
This base allows you to cut the proper sized hole at the base of the shaft to hook the trigger up with the cord and the spring, which is how you know the entire mechanism will work. The spring and cord combination is what makes tongs work.
#6: Create the Grabbing Mechanism
The base of the claw needs to fit tightly into the end of the shaft. This can be done with smart part shopping to get a good tight fit, or if you’re using a wood base you can literally cut and sand it to get that perfect fit that takes some muscle to fit at the end. Once you have a tight fit, then it’s time to further secure it with a couple of screws or bolts.
Some people we know have talked about using Gorilla Glue as being enough, but we don’t recommend that unless you’re already old hand enough at this that you really shouldn’t be reading this article for advice 🙂
While you certainly want to make sure the base of the claw fits snugly into the end of the shaft. You never want the claw to be loose or jiggle as this is crucial to handling and holding the large venomous snake that is probably less than happy that you picked it up. You never want the jaws to be loose.
#7: Run the Thread Through
While each part is important, the thing that brings it all together (literally) is the thread that runs through the shaft and connects the spring-locked trigger system of the grip with the moving claw at the head. While normal rope is acceptable or even high-grade fishing line, we recommend thin steel wire like THIS on Amazon.com.
#8: Test the Trigger & Grip
Your first test shouldn’t be out in the field. You want to make sure to hold the DIY snake tongs, practice using the trigger, even look at using it to move some objects around the garage just to get used to how it feels and make sure you are happy with your setup. While hopefully everything is smooth, this is the last chance to make adjustments as needed before you go out using it in the field.
#9: Test Safely
If you have the ability to test this on a large non-venomous snake that is ideal since it allows you to test the tongs to make sure they work effectively. This is tied to step #8, but this also means that you need to be fully protected in the event of a snake bite. This means not only being prepared with your snake tongs and bucket but you also want to make sure you have on solid leather boots (if not outright snake boots), as well as snake proof chaps or gaiters.
In other words, make sure sure you’re fully prepared and if you live in an area where it’s not hard to find snakes, consider taking a test run by looking for a big non-venomous snake, or a smaller venomous snake to try out your DIY built snake tongs in a safer setting before having to tackle a big one, and even then you should always have a partner watching your back.
That’s it. Follow your design and those steps and it may take a time or two but you’ll soon know exactly what you like best about your custom built snake tongs and be able to adjust them accordingly.
Snake Tongs vs. Snake Pole vs. Snake Hooks
Many people want to know the difference between snake tongs, snake hooks, and snake poles. This is really understandable because these tools aren’t the same – not even close! While they are all tools with the same purpose, there’s no denying that they work in very different ways. That goes for all forms of these three major snake wrangling tools, and not just from the DIY perspective.
Snake Poles
Snake poles are the easiest types of snake wrangling tools to make at home. A simple long pipe whether metal or PVC, a long bit of rope, and a few nuts and bolts and you can design a snake pole without too many issues. There are countless videos online of how to make these portable snares, and in fact if you try to find online instructions or video guides for making snake hooks or snake tongs, generally the videos that come up are going to actually be these poles.
A snake pole has a little noose of rope around the end of a pole that you slip over the snake’s head and down the neck a bit, and then you can tighten to get a firm grasp. However, snake poles are incredibly UNPOPULAR with professionals for one really good reason: these tend to badly injure the snakes, often to the extent of being fatal.
This makes them unacceptable for humane relocation needs, and can get property owners potentially in trouble if they are handling endangered or protected species. If you see a pole with a loop of rope at the end, that is a snake pole. They are generally not used by any professionals.
Snake Hooks
Fairly self explanatory, snake hooks are used to move large or venomous snakes with the 1-hook, 2-hook, or a hook & tongs method. These can be used for smaller venomous snakes but are often popular for moving larger ones. These are basic but effective when properly used. There is an easy to grip handle, a long shaft that is often 36 inches on the small side and can go all the way up to 72 inches for the longest non-custom ones (although obviously you can make your own to preference).
The end has a wide hook that isn’t sharpened but is designed to be wide enough to fit a wide body snake like a rattlesnake, water moccasin, or even a really big and fat bull snake. The hook is designed to allow you to balance the snake while two hooks can help balance larger snakes and keep them at arm’s length.
There is no grip or closing top to tongs. Hooks are just what they sound like, open ended and a solid option for transporting a snake, and keeping the lid of a snake bucket firmly in place as you get it lined up and sealed.
Snake Tongs
Snake tongs are the most complex of these tools, and that’s not really saying much because they are relatively simple in concept and execution. That being said, tongs give the best benefits of hooks and poles with less of the drawbacks. There’s a lot to like about these designs with the first and most obvious being the extra control you get over a situation.
They are also far less likely to hurt a snake when properly used than a snake pole, making them more humane on top of the fact they are already more effective.
Catching Snakes Using Snake-Catching Tools
One important thing to remember is to always wear appropriate snake protection. We’re big fans of snake proof chaps, however some people prefer to go with snake proof boots instead. The key is making sure your lower legs are protected so that if the test doesn’t go well, or there’s an early miss, you will still be protected from any venomous snake bite.
There are various methods that can be used for catching snakes, and this isn’t something that should be done without training, support, or practice. The best tools are only going to help out so much if you don’t know how to use them properly.
If you have any questions about the process itself for wrangling snakes, then make sure to check out our in-depth article on how to catch snakes using snake tongs before attempting anything. Seriously, you want to be prepared before ever interacting with a large snake whether venomous or not.
In Conclusion
While once again we strongly encourage you to buy from a recognized premium brand whenever possible, because you never want sub-par gear when handling venomous snakes, if you want to make your own snake hook or snake tongs you now have the instructions you need to get it done. We still recommend the hook and tong method where you have at least one of each, and that means both of these YouTube videos are going to be useful if you decide to build all your snake moving equipment from scratch.
By following the instructions and clear processes that are delved into in each of the two videos featured on this page and you will have the knowledge, tools, and ability to learn how to make your own DIY snake hook or snake tongs to give yourself the tools you need to safely move venomous snakes.
With some smart construction and a little practice you’ll be a pro and using those DIY snake tongs and DIY snake hooks from your workshop to keep your area clear of intrusive snakes.

