Rock climbing is an amazing sport but can be intimidating to get started. Maybe you saw Free Solo or the Dawn Wall which showed climbing at the highest levels and it inspired you to get into climbing. Or like a lot of people, you tried indoor climbing and thought it was rad. It’s not surprising as climbing is both physically and mentally challenging.

Important Note: Rock climbing isn’t an area my brother or I know very well. That’s why we went looking for a professional outdoor enthusiast who had the expertise and authority to give you the right information on this topic. That’s why this is a guest post from experienced outdoorsman and veteran rock climber Winston Endall.
An avid backpacker, wilderness survival instructor, and rock climber – he was the perfect rock climbing expert to provide this truly outstanding article for us and our readers. In appreciation we’d like to share that Winston has a podcast you can find at livewildradio.com and a Fiverr account where he can be hired for top-notch outdoor articles for your blogs, as well. Enjoy the article!
I equate it with a physical puzzle where you have to move your body through space by figuring out the series of movements needed to progress upward.
The stoke is great but no one should be starting on El Capitan. Climbing is a sport with levels that you work your way through for both safety and skill reasons.
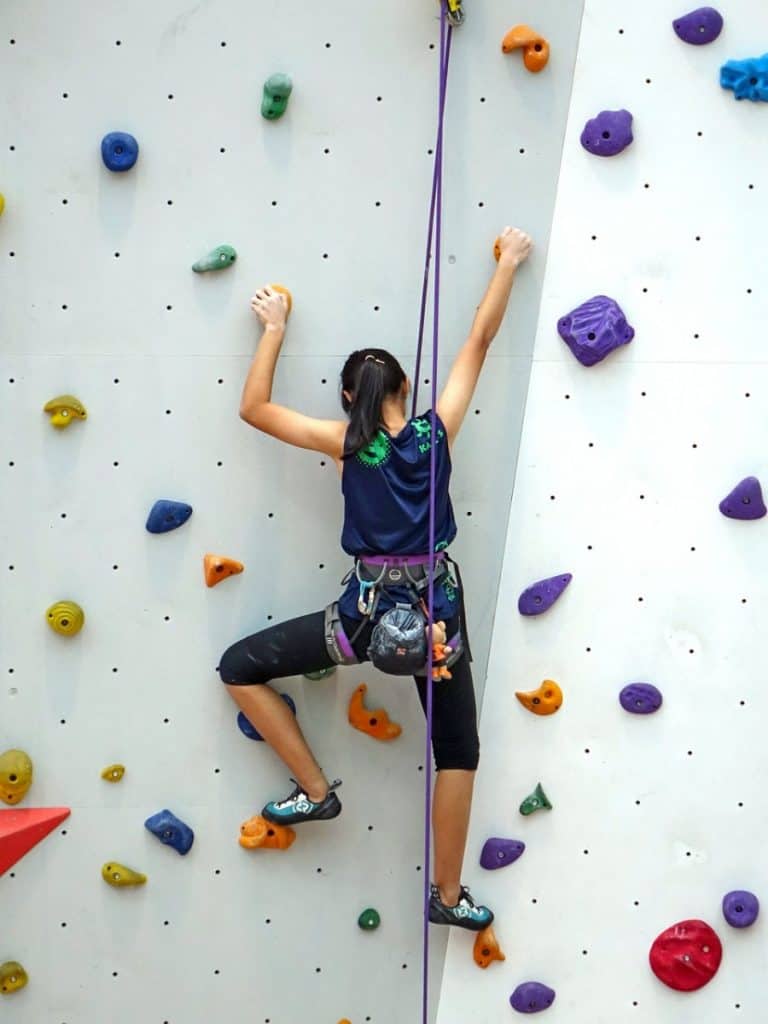
There is both indoor climbing on artificial holds and outdoor climbing on real rock. While skills are complementary, they each have their own unique elements that will take time to learn. When climbing indoors it is easy to see what holds to use as they are color-coded for each climb but you are limited to using those holds.
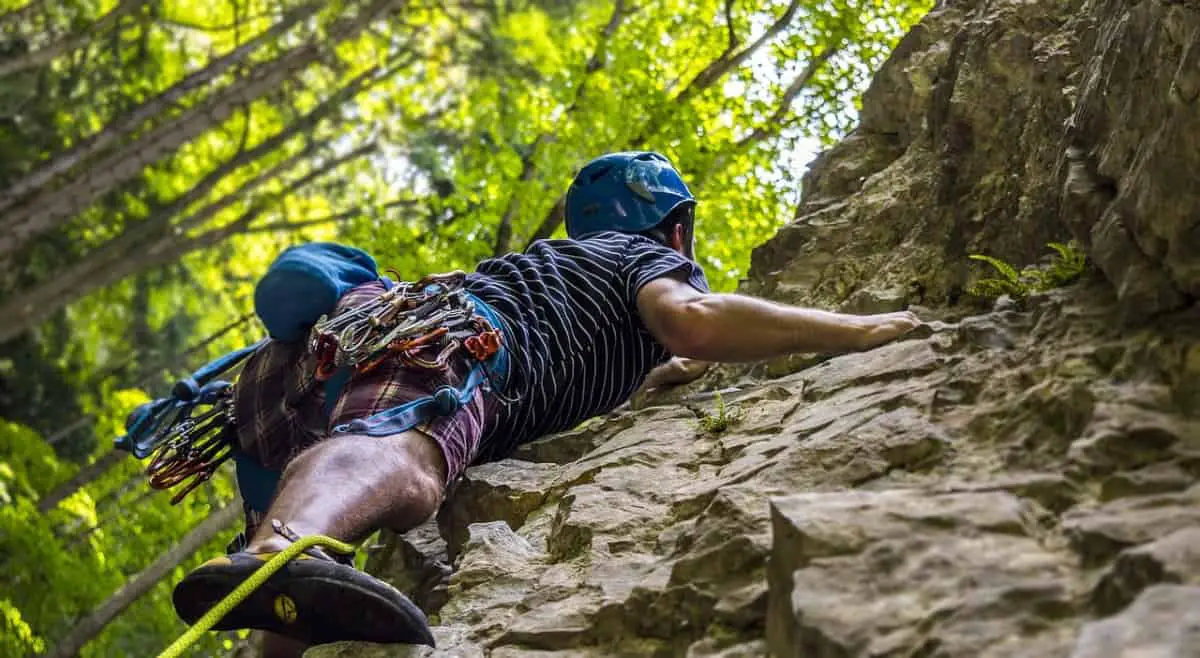
Outdoors you can use anything on the route but since the rock is usually all the same color it can be hard to tell what to use.
Rock climbing is a potentially dangerous pursuit. Even when you do everything by the book you can still get hurt so it is important to take the time to learn the risks and how to minimize them. As a beginner climber, you have a whole world of new things to learn.
The following tips should help you progress from person just beginning climbing to an experienced rock rat with calloused fingertips and ripped forearms.
Table of Contents
Know Your Climbing
Rock climbing isn’t just one thing. There is indoor versus outdoor broken up into a number of disciplines. Below are the main ones with a brief breakdown of what you will need for gear and knowledge.
Bouldering
This is climbing at its most basic. No equipment other than shoes, chalk, and a crash pad to cushion your falls. The problems are generally pretty low (less than 15 feet) with the emphasis on difficulty rather than length. You will usually climb with people who will take turns spotting each other if you do peel off the wall. In the gym bouldering is the type of climbing many people begin with as it requires little gear or knowledge of safety systems.
Top Rope
Top roping is the safest form of roped climbing as long as your anchors are bomber, which for this they always should be. You will create an anchor at the top of the cliff with the rope going through like a pulley system. The climber will be tied into one end and the belayer (person who takes in the rope and catches the climber if they fall) will be attached to the other side.
As the climber climbs the belayer takes in the rope keeping it relatively snug so if they fall they don’t go anywhere. Once to the top, the belayer will lower the climber back to the ground and then they switch roles. This only works on crags where you have easy access to the top.
Make sure to put a knot at the end of the rope on the belayer’s end so you can’t drop your partner if the rope is too short.
For top-rope climbing, you will need a climbing rope (60-70 meter), anchor material such as slings or static lines, harnesses, climbing shoes, chalk, locking carabiners, helmets, belay device and helmets.
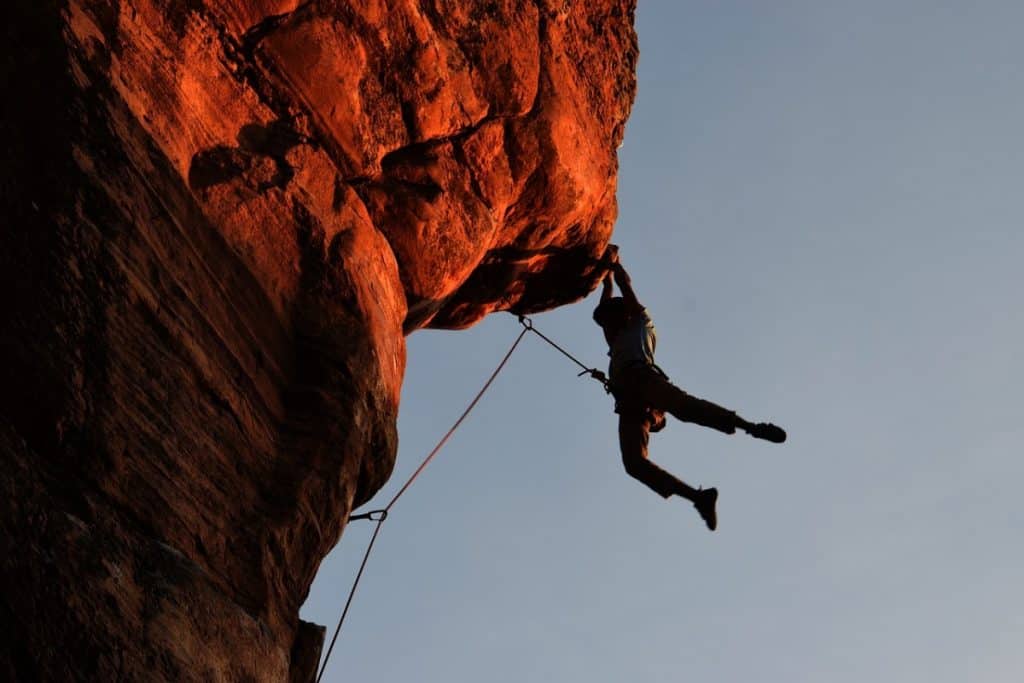
Sport Climbing
This is lead climbing where the climber starts from the bottom and clips preplaced bolts for protection as they climb. You will carry quickdraws to connect the rope to the bolts. This is a short sling with a carabiner at each end with one carabiner to clip the bolt while the other end if to clip the rope.
The belayer will feed out the rope to the climber and be ready to catch them if they fall. Once the climber gets to the anchor the belayer will lower them to the ground so the height can’t be more than half the length of the rope. To minimize the risk of hitting the ground if you fall before the first bolt it is a good idea to clip the rope to the first bolt with a long pole called a stick clip.
After the climb is done, someone will have to climb it again to clean the gear still attached to the wall and then get lowered back to the ground. Take lessons from experienced climbers or certified guide to learn how to clean a sport route as it can be dangerous if done wrong.
Once again knot the end of the rope so you don’t risk dropping your partner when you lower them.
In any form of lead climbing, the falls are longer as you will fall twice the distance you are above the last bolt you clipped plus however much the rope stretches.
Most climbing gyms that have roped climbing offer sport climbing classes so you can get started in a safe environment.
For sport climbing, you will need a climbing rope (60-70 meter), 12-15 quickdraws, locking carabiners, harnesses, belay devices, climbing shoes, helmet, and chalk bag.
Trad Climbing (Trad = Traditional)
Trad climbing is lead climbing like sport climbing, only instead of clipping pre-placed bolts, you are placing your own protection in the cracks along the way. This can be cams that expand in the cracks or tapered nuts that you will lodge in constrictions.
You need to carry a mix of sizes and styles so you have the right size and shape to be able to protect yourself along the way.
Each anchor is called a placement. Since they are temporary it is a good idea to extend your connection to the rope with a long sling to reduce drag and limit the chance of the rope moving the placement.
Your collection of protection pieces is called your rack. For many places, a standard rack will be a set of Black Diamond Camalots sized from .3-3 and a set of nuts but you may need multiples of a given size depending on where you climb. Most guidebooks will give you a recommendation of what protection is needed for climbing a particular route.
Gear wise you will need everything you need for sport climbing plus a rack of trad protection and longer slings.
Trad climbing has an expanded range of skills needed including gear placements, route finding (there are no obvious bolts to follow), and self-rescue. It is recommended to spend a lot of time under a good mentor or take courses with accredited guides to build the skills before you lead trad routes yourself.
Multi-Pitch
When a climb is longer than the length of the rope you will need to break it up into pitches. This can be either sport or trad. The first climber, called the leader, will climb until they are near the end of the rope or find a good location to anchor.
They will then anchor themselves in and belay the second climber, appropriately called the second, up to the anchor point. The second will clean all of the gear as they climb and give it back to the leader.
The leader is then put back on belay and climbs the next pitch. This is repeated until you get to the top.
Once at the top, it isn’t uncommon to have to rappel (controlled slide down the rope using a braking device) to get back to the bottom. When rappelling always knot the end of your ropes so you can’t slide off the end.
Multi-pitch climbing requires all the gear for sport or trad climbing plus slings and locking carabiners to build anchors and rappel devices. You will also need to carry a small backpack with snacks, water, first aid kit and shoes if it is a route you can walk off of the top.
Warm Up More Than You Think You Need
New climbers often just hop on the wall to climb without thinking about warming up. Don’t do this.
Most people who get into climbing haven’t developed the finger and tendon strength to climb hard and this can lead to injury. Climbing uses the whole body so make sure you do a full-body warm-up before climbing and start off climbing a number of routes that are easy for you to get your body primed for harder efforts.
And keep in mind the fitter you get the more it takes to warm-up.
Train off the Wall
When you first get into climbing it is easy to just want to climb all the time. This will make you progress for a while but can also lead to overuse injuries. A smarter plan is to climb, whether indoors or outdoors, 2 to 3 times per week combined with some cross-training.
How you structure your program can vary but including strength, conditioning, and mobility work will help you progress quicker and reduce the chance of injury.
At a minimum, you will want to include some pushing exercises to balance out all the pulling you do climbing as well as rotator cuff exercises like the face pull.
A few sessions a week of cardiovascular training such as mountain biking or weighted hikes will help with the fitness needed to get to crags that have a long approach. Nothing is worse than being tuckered out before you even start climbing.
Make Friends with Experienced Climbers
Rock climbing has a long history of mentorship. Long before it was easy to book a course with a guiding company, the only way to learn the ropes was to go out with more experienced climbers. This is how I learned and many in my shoes try to pay it forward.
Climbers are a friendly bunch. Don’t be afraid to chat with people at the climbing gym or crag. Just be sure to wait for them to finish climbing or belaying. You can often ask for pointers or get questions answered.
Look for climbing groups or festivals in your area. This is a great way to become part of the community. Being able to talk to other climbers can help you understand the ethic of the area and gives you a source of information and inspiration.
Find Out Where to Climb
When you are new to rock climbing you not only have a lot to learn about how to climb but also where to climb. Depending on where you live you might have a local crag but for many, it means traveling. I’m lucky enough to have a number of crags within a half-hour drive but they are pretty short so when I want to climb bigger stuff it means some research.
If you climb at an indoor gym then ask the other climbers and people that work there. They often sell local climbing guides and you will quickly find people that have traveled to countless locales to climb.
For online resources, if you are in North America start with Mountainproject.com. The interactive map lets you scan around and see what is in an area. By clicking on a location you can see the routes with descriptions and comments from people who have climbed there recently.
The overview of each area will usually have a link to the printed guidebooks so you can order your own copy. There is also a forum that has regional pages plus sections for beginners, gear, sport and trad climbing.
Mountain Project also has a free app you can download on your phone which lets you download the route information for offline use.
Summitpost.org and Thecrag.com are two other online route guides that while not as extensive as Mountain Project may have information that it doesn’t.
Another good source of beta is your local climbing shop or an outdoor store that sells climbing gear. I work in the climbing section of a big outdoor store and spend a lot of time showing people cool places to climb with tips on the right routes to get started on, how to get there, and any regulations they might need to know.
Don’t Get Scammed on Gear
Like most things, you can find cheap knock-off versions of climbing gear. Since you have to trust your life to your gear avoid these with a vengeance.
But how do you as a beginner climber know what is real and what is fake?
Any personal protective equipment like harnesses, ropes, carabiners, and belay devices have to be certified. Look for UIAA and CE certification on the item. Make sure you only buy name brand gear from reputable sources.
When starting out it is a safe bet to stick with the leading brands like Black Diamond, Petzl, DMM, Mammut, Metolius, Sterling Ropes, and Camp. There are other brands that make good equipment but these are all ones I use myself and they have a long history of high quality products.
These brands have a vested interest in not getting sued so they make sure their products are up to standard and stand behind them with good warranties.
Since the big brands are sold in a lot of places you can save money by keeping your eyes open for sales rather than risking getting sub-standard gear.
Climb Easy to Climb Hard
When you first start climbing the inclination is to keep trying harder and harder routes. If you did 5.8 last time then you are aiming for 5.9 for this session. This is like testing your 1-rep max every workout.
You will quickly stall out in your progress as you aren’t able to do enough climbing to either build strength or practice technique. Plus climbing at your limit increases the risk of injury.
When you are climbing at your limit you are barely holding on which means you aren’t in a position to focus on technique
A better idea is to only push your max once a week with your other sessions climbing below your limit but doing a higher volume of work. Do more boulder problems or climb more routes with the aim of higher over-all work and making each move as an emphasis on quality of movement.
It’s All About the Feet
When you first start climbing there will be a tendency to pull with your arm. This will needlessly tire you out. Instead, think about your arms being there to keep you from falling off the wall and your legs being what propel you upward.
Focus on your foot placements. I often see new climbers pawing the wall with their feet rather than putting their shoe on the hold. Look at your feet and be deliberate when placing your feet.
As much as possible use the toe of your shoe rather than the inside as it gives you move control and you can extend higher to reach further holds. When working on improving footwork play a game I call Ninja Feet. The aim is to place your feet precisely and not make a sound.
At the climbing gym or at the crag take some time to watch other climbers. See who moves like a dancer and who is fighting with the rock. Find people who are built like you who climb well and emulate their style.
The smoother and more precise your movements the less energy it will take which means you will have more left to finish the climb.
Choosing The Right Climbing Shoes
When you beginning rock climbing one of the first purchases you will make will be shoes. Special purpose climbing shoes make all the difference in how your feet stick to the wall. Don’t try to climb in tennis shoes or hiking boots.
Here are a few tips to get a good shoe:
- Novice climbers should start with flatter shoes rather than downturned.
- The shoe should fit snug with no extra space around the toes but toes shouldn’t curl.
- Don’t believe anyone who says climbing shoes should crush your feet. They aren’t comfortable to all-day wear but shouldn’t be painful.
- Depending on the brand, climbing shoes often size down 1 or 2 sizes over your street shoes.
- Get a shoe with thicker rubber (4-5 mm) as you will wear the rubber out quicker until you learn good footwork.
- Lace-up or Velcro is good but laces allow for more adjustment to the fit.
- Look for sticky rubber such as Vibram as quality rubber can make a big difference in your confidence.
- When outside, don’t wear you climbing shoes unless you are climbing. They aren’t great for walking around.
Learn the Etiquette to Be a Good Climbing Citizen
Climbing is a community and as such, it has an etiquette that helps keep you safe, get along with others, and protect the environment and access to the crags. For many of you who are new to climbing, this is your first exposure to the wild outdoors so it isn’t surprising that there are things you don’t know.
If you abide by the suggestions below you will endear yourself to fellow climbers and not commit unintended errors that could be avoided. You don’t want to be the noob that causes issues just because you didn’t know better.
The below list is from Rock Respect which came up with this guide to help new climbers transition from indoor to outdoor climbing.
Respect the Dangers
- Learn necessary outdoor climbing skills from a guide/mentor
- Learn about the cliff: style, protection, difficulty, area hazards (ie. Poison ivy)
- Wear a helmet as rocks can break
- Yell “ROCK” if you kick a loose rock or drop a piece of gear
- Watch for sharp edges that can damage/cut rope when lowering/rappelling
- Inspect/clean your gear often. Replace when worn/expired
- Triple check and back up your systems (harness/knot/belays/anchors/rappels).
- Communicate with your partner and other climbers
- Learn how to detect if fixed gear/bolts are safe
Respect the Environment
- Pack out your trash & pick up after others
- Stay on designated trails to lessen your impact
- Do not urinate under overhangs or in caves. It does not wash away!
- Use existing bathroom facilities / Dig a hole, cover it and pack out TP
- Do not feed or hurt animals
- Do not damage trees or plants
- Leash dogs to not disrupt wildlife & others
- Keep gear/backpack on non-vegetated surfaces to avoid damaging plants
- Do not damage/chip the rock. Brush off your tick marks
- Start fires only in designated/contained pits
- Be aware of seasonal fire bans and follow regulations
Respect Others
- Share climbs with others
- Climb in smaller groups
- Check if dogs are allowed
- Pull your ropes when finished, yell “rope” when pulling ropes
- Keep the noise down as climbers need to hear each other. Leave the boombox at home.
- Do not smoke around others
- Respect the “right of way” on multi-pitch/shared anchors
Respect Access
- Respect landowner rules or state/provincial/federal regulations
- Do not leave gear unless permitted
- Park considerately, carpool if possible
- Camp only in designated/permitted areas
- Respect area closures (seasonal/permanent)
- Pay required entrance fees/permits
- Get involved with local access coalitions
- Follow regulations for drone use
Practice On the Ground
Part of your training as a new climber should be practicing all of your safety skills on the ground. Ideally, you will practice and get feedback from a mentor or guide. Work on the skills until you don’t have to think about them. When you aren’t climbing, practice with your climbing partner so you have a well-established system before you go out.
Develop a habit of triple checking knots, carabiners, belay devices, and rappels.
Here is a list of skills to perfect on the ground and practice between climbing sessions.
- Knot tying
- Belaying
- Cleaning an anchor
- Communication (verbal and non-verbal such as rope tugs when you can’t hear your partner)
In Conclusion
Always Be Learning. Rock climbing, especially outdoors requires knowledge of gear, technique, and fitness that takes time to build. I’ve been climbing for 35 years and I’m still learning new tricks to climb better and make things safer.
Don’t be discouraged if you don’t get it all your first season. Take your time and make sure you always double-check your knots.
This isn’t a waste of time: it’s guaranteeing your own safety so that there are many more great climbs in the days ahead!